
Tactics
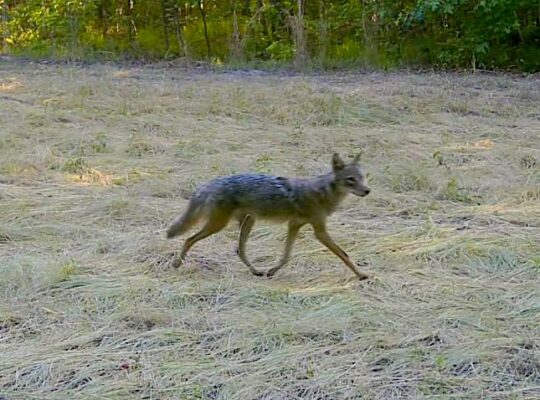
Beat the Wind During Warm-Weather Predator Hunting
June 3, 2026 •iSportsman Staff
February 7, 2024
iSportsman Staff
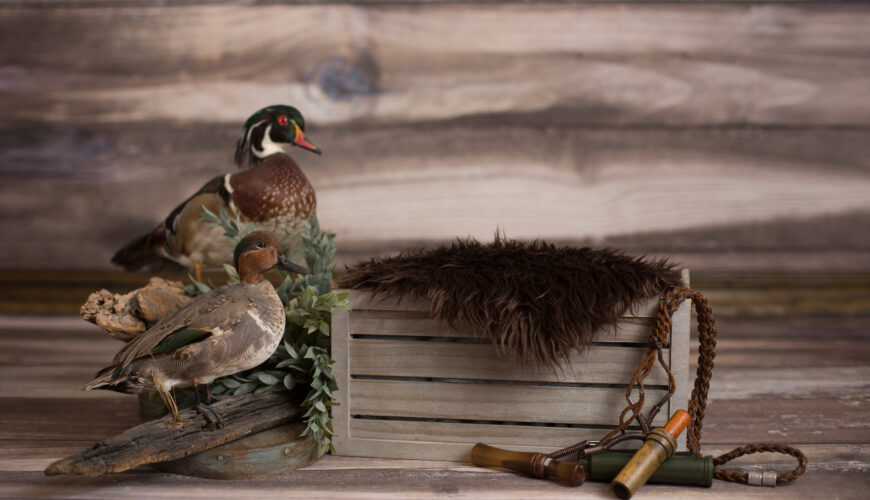
With another duck season ending, you may be thinking of mounting a duck. Taxidermy falls in and out of fashion as the years go by, but a few things remain consistent: everyone — even those outside of the hunting community — knows exactly what bad taxidermy looks like and well-done taxidermy is something that can be maintained and passed down through generations.
So where to start? Should you take the DIY path or find a specialist? Is your harvest even suitable for the investment (either monetary or time) to mount? iSportsman covers it all in this Duck Mounting 101 guide.
You may think that the starting path towards mounting a duck begins with either a DIY taxidermy set up, or properly packing your harvest for delivery to a seasoned taxidermist. However, when deciding to mount a duck the preparation starts in the field. John Manion of the Louisiana Sportsman sat down with world champion taxidermist Kevin Hynes to cover the basics. Here are the key takeaways:
Bird Zone Taxidermy breaks down the field dressing process for a future mount:
Once you have your bird, the preparation process for both DIY-ers and specialist seeking patrons is the same. You must immediately treat your duck well for a better finished product. Kevin Hynes recommends wrapping it in paper, as it pulls the moisture from the duck. He also took the time to dispel the old wives tale about wrapping it in panty hose — that casing would constrict the duck and its feathers in a way that would inhibit the process. The best wrapping for a pre-prepped bird is simple: Lightly place your bird in a heavy-duty freezer bag shoulder first.
The next step is crucial regardless of the path you take. You must avoid letting your package duck get burned in the freezer. The following tips should be helpful:
Lastly, getting the duck to the taxidermy stage of the process will help tremendously in avoiding freezer burn. Some experts claim that properly packaged ducks can survive one to two years, but for novices that time may be much less. The taxidermist will want the duck in a thawed state, so once you’re ready to try your hand at your own duck mount, or you’ve found someone you trust to do so for you, take the duck out of the freezer and let it thaw for 25-hrs at room temperature much like a Thanksgiving Turkey.
Once your harvest is properly stored, it’s time for the big decision: to do it yourself or find a specialist. The harsh truth of this is that taxidermy is, at its core, an art. And good taxidermy will be performed by someone with experience and an eye for detail. If you’re crafty by nature and willing to start, great! We aren’t trying to deter you. However, this fact is also important to bear in mind when choosing a taxidermist as well.
Indicators of high-quality taxidermy in duck mounts are almost universal across all mounted animals. The Union Sportmen’s Alliance shared that there are five key focus areas that make or break a mount’s appearance: Two eyes, two ears, and the nose. Perhaps that’s why a lot of novice taxidermist praise the ease of duck mounting—no nose, and no ears. So, if you didn’t mash up with bill with buckshot you should be in the clear, right? Well, sort of.
Other important quality indicators are the stitching, stuffing, and shape. If you’re looking for a taxidermist to do the work for you, it can be helpful to visit their store or website and closely observe their work for these. Is the stitching visible? Is the animal stuffed or shaped in a way that looks unnatural, or stressed? The decision to mount a duck is usually spurred from the desire to encapsulate the duck’s natural beauty. So, if a taxidermist’s work is a cavalcade of stressed, odd, shaped animals — or you know you wouldn’t be able to avoid this mishap yourself — your search for a more skilled taxidermist should continue.
If the duck mounting process hasn’t ruffled your feathers quite yet and you’re still determined to take the plunge, here are the basics of where to go from here for mounting a duck.
Like a lot of outdoor hobbies, the taxidermy community is a close-knit circle. Forums such as Taxidermy.net are still frequented and recommended for novices and enthusiasts alike. Internet personalities such as Chuck Testa also offer multiple series on the how-to process to guide you along.
While the skinning and deboning process isn’t too dissimilar than other field-dressing methods the quality of your tools for breaking down your duck and putting it all back together again will make a difference. Remember how we said that taxidermy, at its core, is an art? The next steps require navigating art supply retailers for high-quality false eyes, thread, scissors, and more.
Beginner’s kits are available if you’d like to skip buying things al-la-carte. The Van Dyke’s kit is often recommended, but others such as the Wasco line of bird mounting kits are affordable options. Both these kits come with the standard supplies you will need, such as a false body, borax, neck material, false eyes, wire, thread, and additional instructions.
Many online taxidermy forums suggest starting your taxidermy journey with something you don’t have your heart set on, such as feeder mice or rats. Then, once you’re familiar with the practice and have a well curated repertoire of tools you can make something truly stunning to treasure. So, whether you have a bird in the freezer and are ready to start now or know you’ll have to wait until next year, we hope you’re more prepared to procure the mounted duck of your dreams.
June 1, 2026 •John N. Felsher